AutoSort
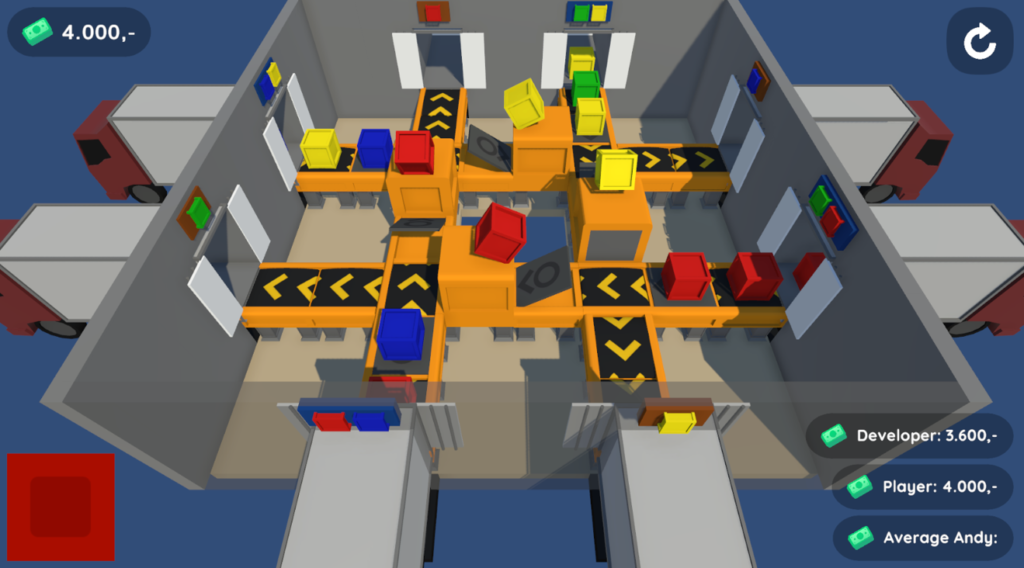
During Project EYA, I had to create a game about something that fascinates me. My fascination lies in automation. Building a complex factory and watching it run automatically is a very satisfying experience. The game has 3 tutorial levels and 3 regular levels, as I didn't have more time for additional levels. The goal of the game is to create connections in a factory hall, so the red box must reach the red truck. In the game, there are various machines to use, and the objective is to complete the level as cheaply as possible.
Project Info:
Solo Project
Project time: HKU 1 Year Period 3-4 (2024)
Engine: Unity
Code Languages: C#
Design Patterns: Observer, Singleton & FlyWeight


Belt System
All machines are connected to a belt system. The beltpaths are updated from back to front to ensure that items move sequentially and don’t constantly create gaps. Beltpaths can be split and merged. If multiple beltpaths refer to each other (and they aren’t merged), the game tries to assign proper priority to ensure smooth movement on the beltpaths. The game includes the following machines: Belt, Launcher, Pusher, and Side Sorter. (If I had more time, I would have created hanging belts.)

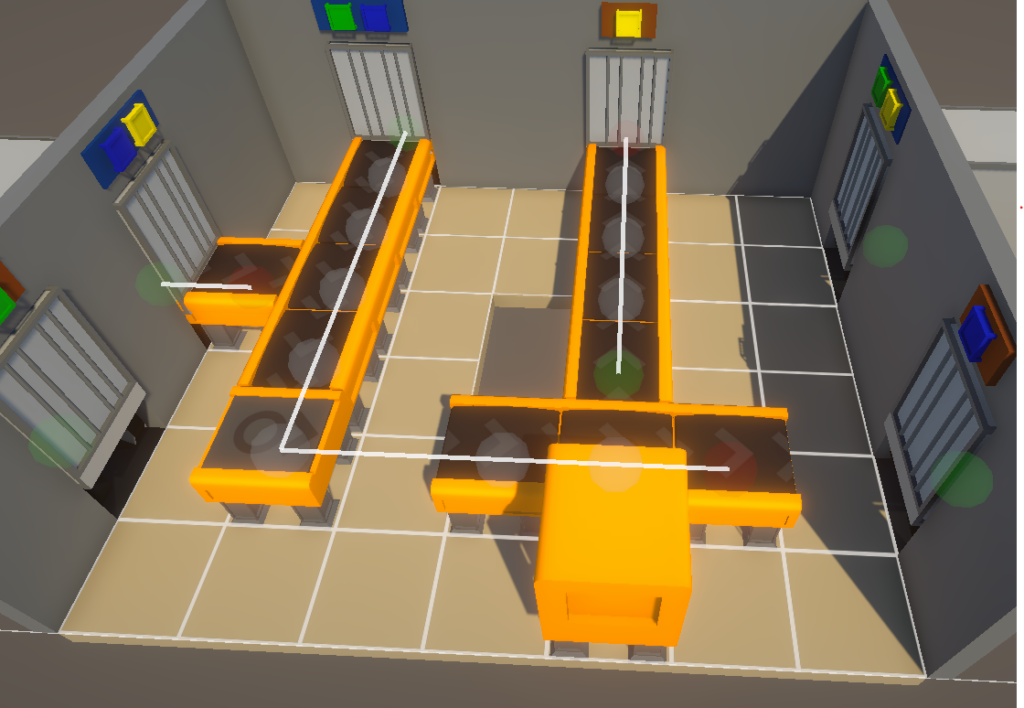
This is how the BeltSystem looks in the editor. Thanks to the visualization, it’s easy to see how the belts are connected to each other.
    public void MergeBelts(BeltPath mainBelt, BeltPath beltToAdd)
    {
        for (int i = 0; i < beltToAdd.GetBelts().Count; i++)
        {
            BaseMachine belt = beltToAdd.GetBelts()[i];
            belt.SetBeltPath(mainBelt);
            mainBelt.AddBelt(belt);
        }

        beltPaths.Remove(beltToAdd);
    }

    public void UnMergeBelts(BeltPath mainBelt, BaseMachine removedBelt)
    {
        int indexBelt = mainBelt.GetBelts().IndexOf(removedBelt);
        if (indexBelt == mainBelt.GetBelts().Count - 1 || indexBelt == 0)
        {
            mainBelt.RemoveBelt(removedBelt);

            if (mainBelt.GetBelts().Count == 0)
            {
                beltPaths.Remove(mainBelt);
            }
        }
        else
        {
            BeltPath newPath = new BeltPath();

            for (int i = mainBelt.GetBelts().Count - 1; i >= indexBelt + 1; i--)
            {
                BaseMachine belt = mainBelt.GetBelts()[i];
                newPath.AddBeltInFront(belt);
                belt.SetBeltPath(newPath);
                mainBelt.RemoveBelt(belt);
            }

            mainBelt.RemoveBelt(removedBelt);
        }
    }
Merge belts and Unmerge belts
Tutorial System
The tutorial system in the game is quite an extensive system (if I may say so myself). It uses a list that can hold various classes (thanks to Valentijn). I wanted a tutorial system in the game, but I didn’t want to hardcode it (the tutorial). I searched online for information but only found Unity tutorials or hardcoded examples. The tutorial system has several actions that can be added and configured. There are a total of 9 actions. These actions track different things, all managed by the EventManager. This allows you to retrieve placement objects, capture UI pressed events, and follow interactions.

    private void NextStep()
    {
        if (tutorialIndex >= 0) tutorialInfo.list[tutorialIndex].DisableAction();
        tutorialIndex++;

        if (tutorialIndex >= tutorialInfo.list.Count)
        {
            tutorialIndex = 0;
            tutorialWindow.SetActive(false);
            tutorialRunning = false;
            return;
        }

        tutorialInfo.list[tutorialIndex].SetupAction();
        UpdateProgressText(0);

        tutorialWindow.SetActive(true);
        tutorialRunning = true;
    }

//Base action class
public abstract class TutorialAction
{
    [HideInInspector] public string actionName;
    [SerializeField, TextArea(1, 20)] private string tutorialText;

    public string GetMessage() => tutorialText;

    public abstract void SetupAction();
    public abstract bool ValidateAction();
    public abstract void DisableAction();
}
Tutorial NextStep function, which advances to the next tutorial step, and the Action base class. (If I would do the project again, I would use a callback when the action gets an update instead of checking from the manager.)